Right after my moving house phase we went full crafting speed ahead. There were lots to do! Nigel's school assignment was to create an animal themed scrapbook and we had the school hols to do it up before the report card day the Saturday after. And the school was organising a food fair on that day itself and each parent was to contribute a food item for the sale. I offered to bake cupcakes, but some of the parents have already taken up the task. So of course the next best thing I do came in mind!
Here's Nigel busy cutting some images. We downloaded from all over the web, we talked about the concept and the crazy little ideas we want inside the scrapbook.
More cutting! This is good practice, I'm proud of him for handling the scissors like an expert.
Crazy ideas also include sticking googly eyes on the colourful parrots we found. That's the cover of his scrapbook titled : GOD'S SAFARI. Here he is making up the layout as he goes. I'm there shaking my head or nodding if it's alright to put this here or not. LOL!
More cutting! We took about a week to assemble the whole scrapbook. It was made entirely of a brown box material I cut from one of those big huge boxes we used for moving house. Had the file rings to hold them together.
Thank goodness for roller glues! No more sticky fingers and yucky mess with the conventional glue. Just roll and stick! I found quite a good selection at our local stationery shop. They look like white roller wipers but instead of correctional tape, it's glue tape!!! Wonderful invention!!!! Buy the refillable ones.
Positioning was quite easy with the roller tapes. And they stick dang well! We had a shark tooth attached to one of the pages (I hear someone took it away during the exhibition!!! So angry at people who can't keep their hands off other people's property!!!! See no touch & take!!!!!) I also stuck a piece of paua shell on another page. This was pretty stuck since I used UHU glue, so it remains intact, I hope. Don't have pictures to show of the inside, Nigel had to pass up his homework so will have to wait when it returns.
Nigel had some pop ups inside as well. I made him write notes here and there to explain some of the things about the animals. It turned out quite well, hopefully the book comes back intact and with not muct to repair. It's really a big huge project for the 2 of us.
Meet Buttons! I made him just for this funfair. I've made many softies, but by far, this is the cutest. I named him buttons, he has buttons for eyes, and button attachments for arms!
Taking over the piano. All the cut outs I assembled for the other buttons. The prototype looks a little lonely here. Body parts everywhere.A close-up of Buttons no.1. My label reads the Buttons, The Cuddlesome Lamb!
A close-up of Buttons no.1. My label reads the Buttons, The Cuddlesome Lamb!
The mess on my dining table.
The mess on the floor. I have a lot of extra fabrics I keep and hoard. It's a sickness we all share!
And this is my favourite! Save-For-A-Rainy-Day coin pouch. I had the smile handstitched and stuck the googly eyes on. Can't resist the ribbon! Wait for the buttons....
Ooooh. Did I tell you, I have a pair of scallop scissors that works beautifully on fabrics and pvc as well!!! I love scallops.
Coin pouches in all the yummy colours.
I even had matching button grips for the zippers.
Buttons half ready. They are beginning to look so cute.
More half done Buttons in a row.
While taking a break I worked on these...
It's the same coin pouch template but a few times bigger.
In between sewing the softies and the coin pouches I started on another softie. (That's me, I have to shift around doing other things to keep myself focused. Weird eh.) This is a cloud pillow. My label reads 'Take a nap on a cloud'
More cloud pillows. I made 8 of these and sold 6. They were quite bulky and taking a lot of display space, but it's supposed to be all poofy and soft mah.
Don't they look so CUDDLESOME!!!!
This is my favourite orange one. Although I sold all the pink ones first, I still like this orange one. Pink does sell!
I also made old-school ponytail holders with the buttons from my studioshoppe. I made a lot of these and it was really fun. There's trick to tying these and I learnt them from Martha Stewart's Kids magazine. I miss that magazine!
I also made a few organza pins. Peach blossom pins that turned out fabulously weddingy! Sorry not close up of these beauties. Will do that when I make more of them.
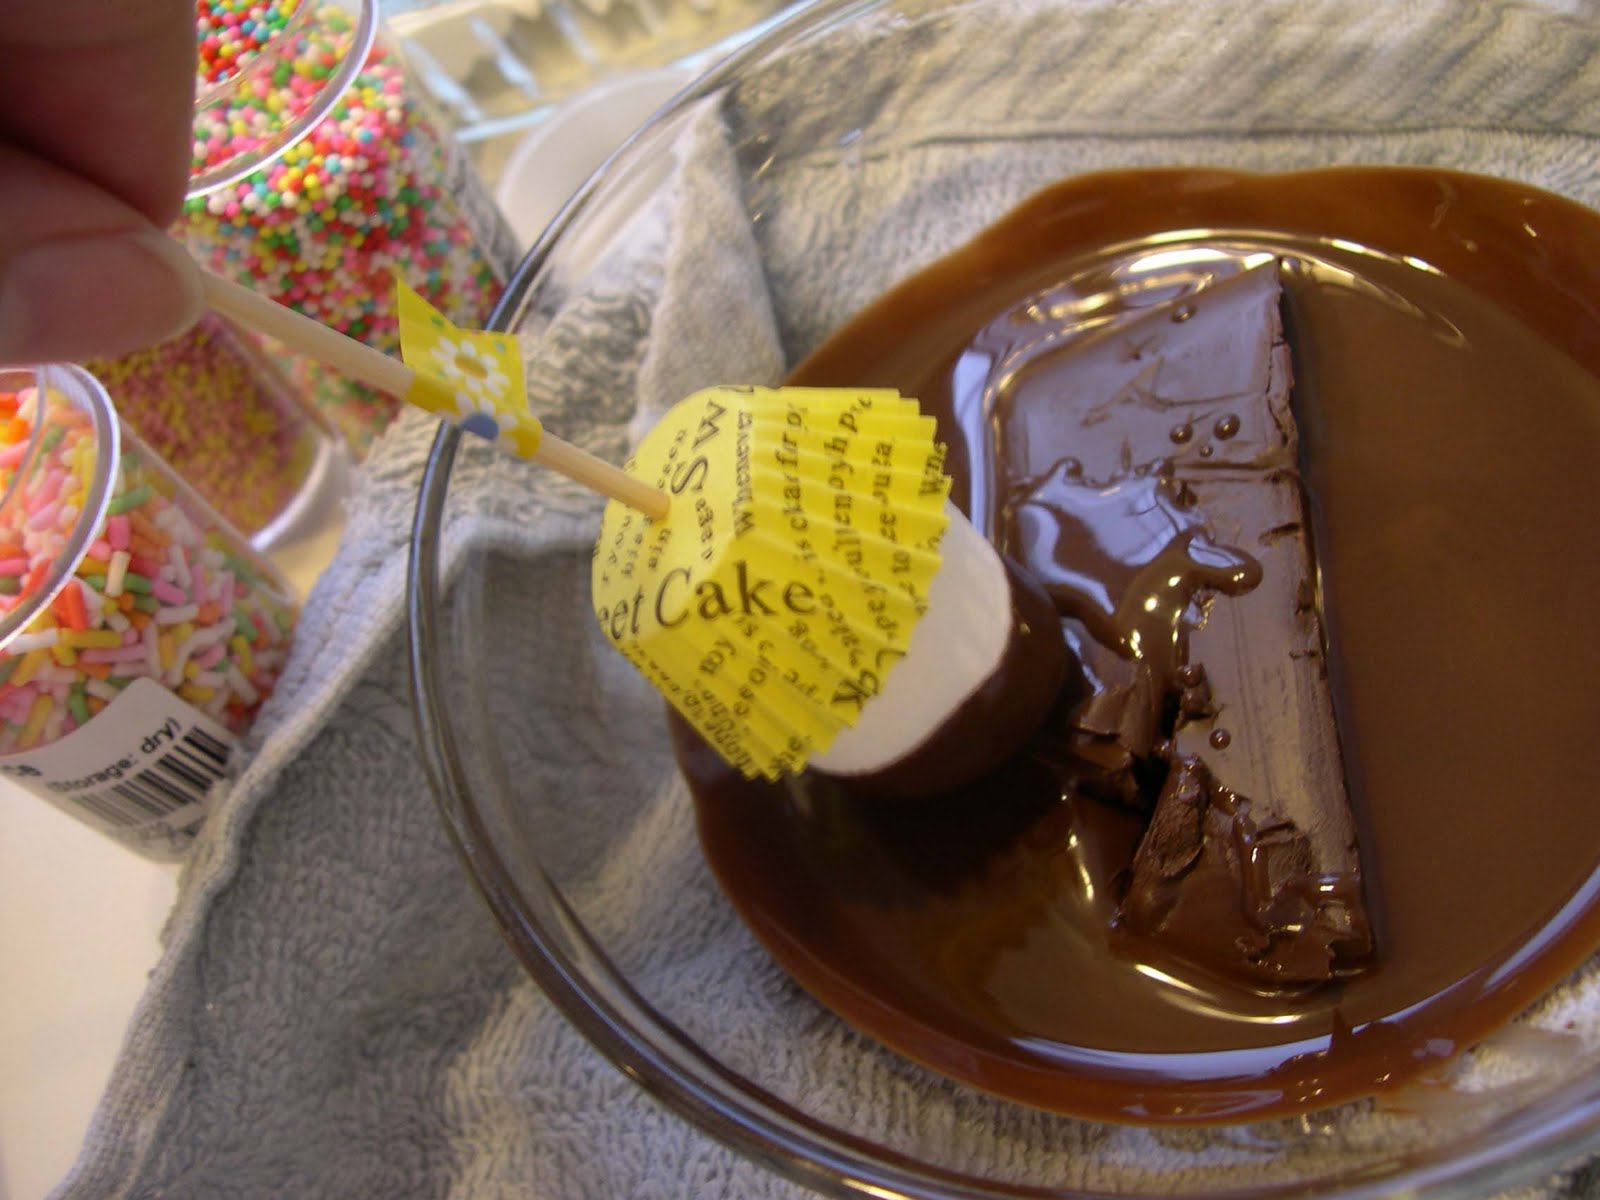
Guess what's this??? LOL! Marshmallow pops. We sold lots of this. This is the process... Prepare the skewers with a little tape around 2 inches away from the top. This will prevent the cupcake papers from sliding downwards. I pre-poked holes with a pin on the paper cups beforehand. Slide one on the top right above the tape.
I melted chocolate on a bowl using a makeshift baine marie. It's important you do not get your chocolate wet with water vapours. It will melt slowly but wonderfully.
I got 3 kinds of sprinkles. Marhmallow pops are a little naked without these.
Getting my workstation organised. You need lots of cups to air-dry the marshmallow pops. Make sure they are tall and deep enough so that they don't topple over.
Poke a marshmallow at the end and deep into the chocolate.
Yummy! Now sprinkle on some magic and voila!!!

Should have made more of these to sell. They sold out! Some even came back for seconds! But at the back of my mind.. what if I don't sell all of them? (Nigel would have a grand day eating them all!!!) Oh yes, I had them neatly packed in glass paper with scallop edging. It was a busy week but not bad for a week of crafting, our stall made quite a lot of money that day!