Thursday, May 03, 2012

HAYLEY'S 1st BIRTHDAY RAINBOW CAKE


Hayley wanted a rainbow cake for her first birthday. She made clear of that when we showed her a collage photos of cakes. She pointed to the same cake three times to confirm and nodded. Yes, she did! She's got this thing for rainbows (probably because her favourite book featured a rainbow of ribbons! LOL!) So we decided to bake her a rainbow cake complete with cupcakes. I wanted to make an anatomically correct one, all 7 heavenly layers! Here's some photos of my first ever 'layered' cake adventure.
THE PREP WORK
It all began with a sketch. The rainbow cake will sit on top of a cupcake tier.

Three tiers to house up to 100 cupcakes.
A close-up sketch of the Sun. Slowly resembling Hayley. He!He!

Slowly shaping the outline of the face with a fondant tool.
 You need a sketch to get the facial placings right.
 Pressing slowly and gently to shape the entire face.
Draw the shapes out for sizing and measurement. Proportion is key now. I hand cut and sculptured the main cloud which will sit on top of the cake. Making sure I have enough skewers to hold the cloud upright later.

Her name on a cloud and coated in edible sparkles.

I hijacked Stan's protein tub to shape the rainbow.

This is so much fun!

All the rows in UNISON! I was such a control freak that day.
I trimmed of the excess white base. So proud of my cute rainbow.


Baking the layers. I used a simple Vanilla Cake Base.
Wilton Colours really shine through. I refrigerated the cakes for awhile. I wanted a firm cake base when I trim the excess.
As I was doing this, I had to giggle non-stop. It was piling up like crazy and I was close to tears wondering If I should trim the cake more. or HOW AM I GOING TO TRANSPORT IT!!!??? (Note to self : NEXT TIME, DO THINK OF THE DELIVERY BOX!) Fortunately, I had a cake box in my store room big enough to hold this!

 THE CAKE ALL DONE!
Ta-da! Glorious! The cream cheese frosting was holding up well.


The Whole Cake and The Cupcake Tier.

I made Orange Poppy Seed Cuppies, Chocolate Fudge & French Vanilla Cupcakes.

Rainbow Coloured Crowns and Butterflies.

Cupcakes everywhere!

A Little Prayer for Hayley and Family.
This girl was all smiles that day! I really wished Meli was here with us that day.


I printed table numbers with Hayley's cute little portraits.

Love the ribbon trims around the tier.
We have a little sprinkles corner where you can decorate your own cuppies too.

Little Hayley and Big daddy.


Cute little family.

HAPPY BIRTHDAY TO YOU!....
Ooooh! Check out the layers inside.
OMG! They were all so even. This is one well-behaved cake.


Yeah! Yippee!


Look at all the pressies!
HAPPY BIRTHDAY SUNSHINE!

Sunday, April 22, 2012

CUPCAKE TEIR TUTORIAL

Building the cupcake tier is probably one of the most requested tutorial I've always been asked to post. One of the advantages of building your own cupcake tier is so that you can embellish and build a tier that is able to host a certain amount of cupcakes and according to the theme of the party. It is inexpensive because the materials are easily found in craftshops and with a bit of imagination you can upcycle it for the next event. Here goes...

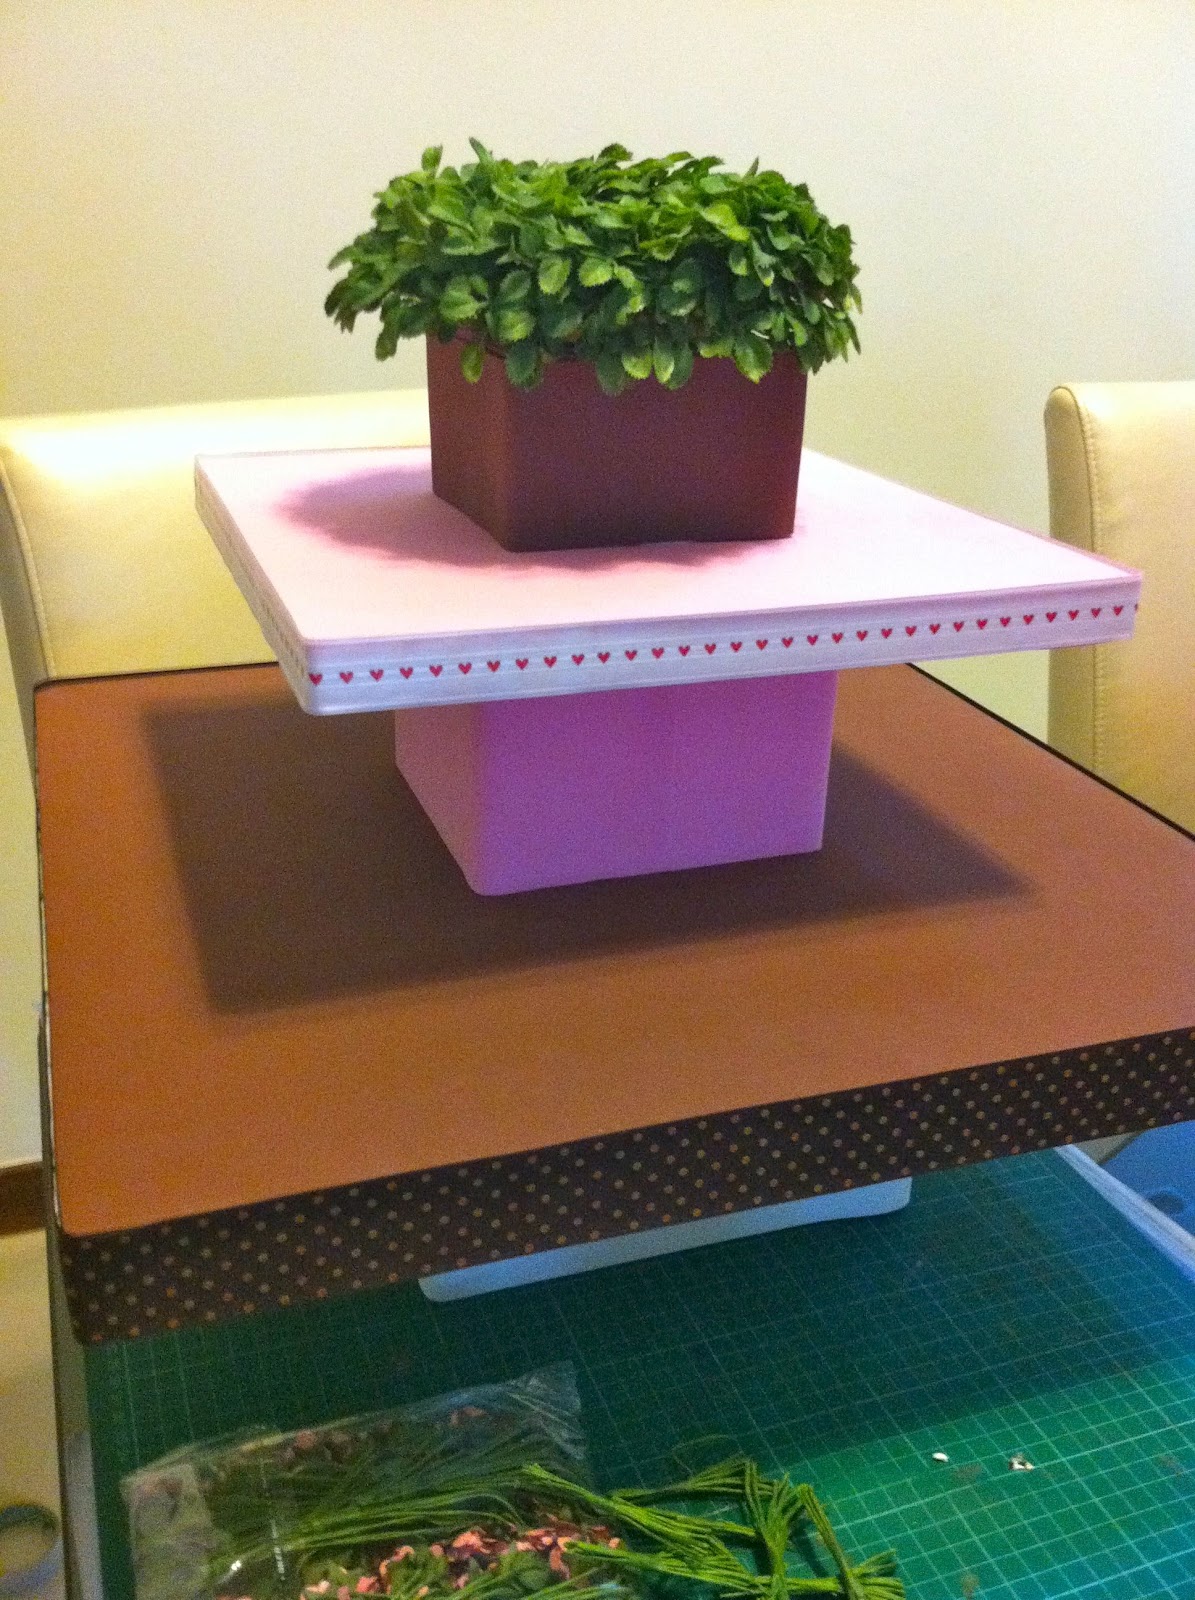
Before you start, I suggest a simple sketch of your tier. How many cupcakes do you want to house on this tier? I have a rough idea what styrofoam shapes are available in the craftstores. Always build from the bottom up, start with a bigger and thicker base and slowly go upwards with smaller bases. Place a few empty cupcake liners to see the placing. Make sure the base is large enough to support the weight of cupcakes on the top layers. Try pressing the edges to see if the base will tip if one side of the cake tier is empty. Tipping is a big no-no, so make the top layer smaller. Each layer should be tall enough to house a cupcake with a mound of cream on the top. Measure with an empty cupcake liner and imagine the buttercream height plus fondant piece if any.

Sometimes you will find ready formed styrofoam pieces you can add on as a topper. This heart styrofoam was skewered with a satay stick onto the top layer to see if the proportion is right for the whole ensemble.

Top view of the tier. See the arrangement of the cupcakes.

I usually do a simple draft of the cupcake tiers so placing the cuppies on that day will be super easy. The chart also determines how much cupcakes goes to which tier.

I decided to fill this heart with miniature paper roses.

Puncture the styrofoam with a toothpick before pushing in a rose.

I covered the layers in PVA foam. They look fondant covered. Double sided tape works best. Matching ribbons all round to cover the edges of the styrofoam layers. Glue the layers together with Styrofoam glue, stick some bamboo skewers in the middle and drive them right through layer to layer. This will ensure the tier will dry stuck together, to avoid gaps in between, weigh the cupcake tier down with weights when drying. I used my hubby's weights for this. Leave this for a day or two to dry. Do not skip this, the stability of your tier depends on your drying time. The drying time is slow, but it really is secure.

There are many ways you can embellish the tier. One of the easiest is using stickers. 3D stickers now come in an exciting variety of sizes and colours. I collect them whenever I spot a potential design that will complement a theme. For Isabelle's pink tier I used this sparkly foam alphabet stickers. I used sewing pins to hold each letter up. It'll be fantastic if you have translucent picks.

I added roses on each tier to complete the look. Secure the flowers with pins. This is crucial so when you move the tier, nothing falls out.

Pinned a felt butterfly sticker to the heart and secured more cascading roses. Think proportion! Think Presentation!

The finished tier. HAPPY TRYING!!!