I made these to decorate my Christmas Tree last year and remembered Jessica asked me for a tutorial. Here it is Jess...
 |
| All you need is Paper. I bought this pretty book from Popular and it comes with folded sheets of beautifully printed wrapping paper all binded and perforated. You need a circle puncher, mine is about 2.5" in diameter, the bigger the circle the bigger the paper ornament. Just make sure you have enough paper to punch 20 pcs of circles for one ornament. Your paper can be a combination of a theme, up to you. Ribbons or any strings, you can use a string of beads or any rope you like. And oh yes, Stick glue or any paper glue you prefer to use. I used a coloured one that dries clear. |
 |
| Close Up of the 'Wrapping Paper' Book. This book can make 1 dozen baubles and you will still have leftovers. Not bad for 10 ringgit. 1 note though, the bigger the ornament, the thicker your paper should be. But thicker paper are hard to punch, so you may opt to manually cut the circles. Or use the Silhoutte machine to cut. |
 |
| You need to prepare a template like the one above. I used Adobe to create a triangle to be placed in a 2.5" circle (this depends on your circle puncher). Accuracy is important here, it is afterall a geometric ornament. I have a few printed, just in case. If you need help with this, just email, I can prep a pdf file with the template for you. Punch 20 pcs of the coloured paper you want for an ornament. |
 |
| Grab a helper to start folding. :) |
 |
| Punch a template out for guide. |
 |
| Place the template on top of the coloured paper like this. |
 |
| With the triangle as a guide, Fold the 3 sides. Crease all 20 pcs. Yes, that's why you need a volunteer. |
 |
| See how accurate your folds are with the template. After a while you can place a stack and fold, depending on the thickness of your paper. |
 |
My unhappy elf! Some more???
 |
| Going bonkers after a while. |
|
|
|
 |
| Glue the folded sides outside the triangle. |
 |
| You need 10 pcs for the top and 10 pcs for the bottom. Prepare the ribbon loop for the top and combine 5 pcs of the circles to make a dome. Refer to the next picture here. |
 |
| See the top dome and the bottom dome. We are not done yet, some more circles to add on. |
 |
| Attach 5 more circles to the top and bottom dome. |
 |
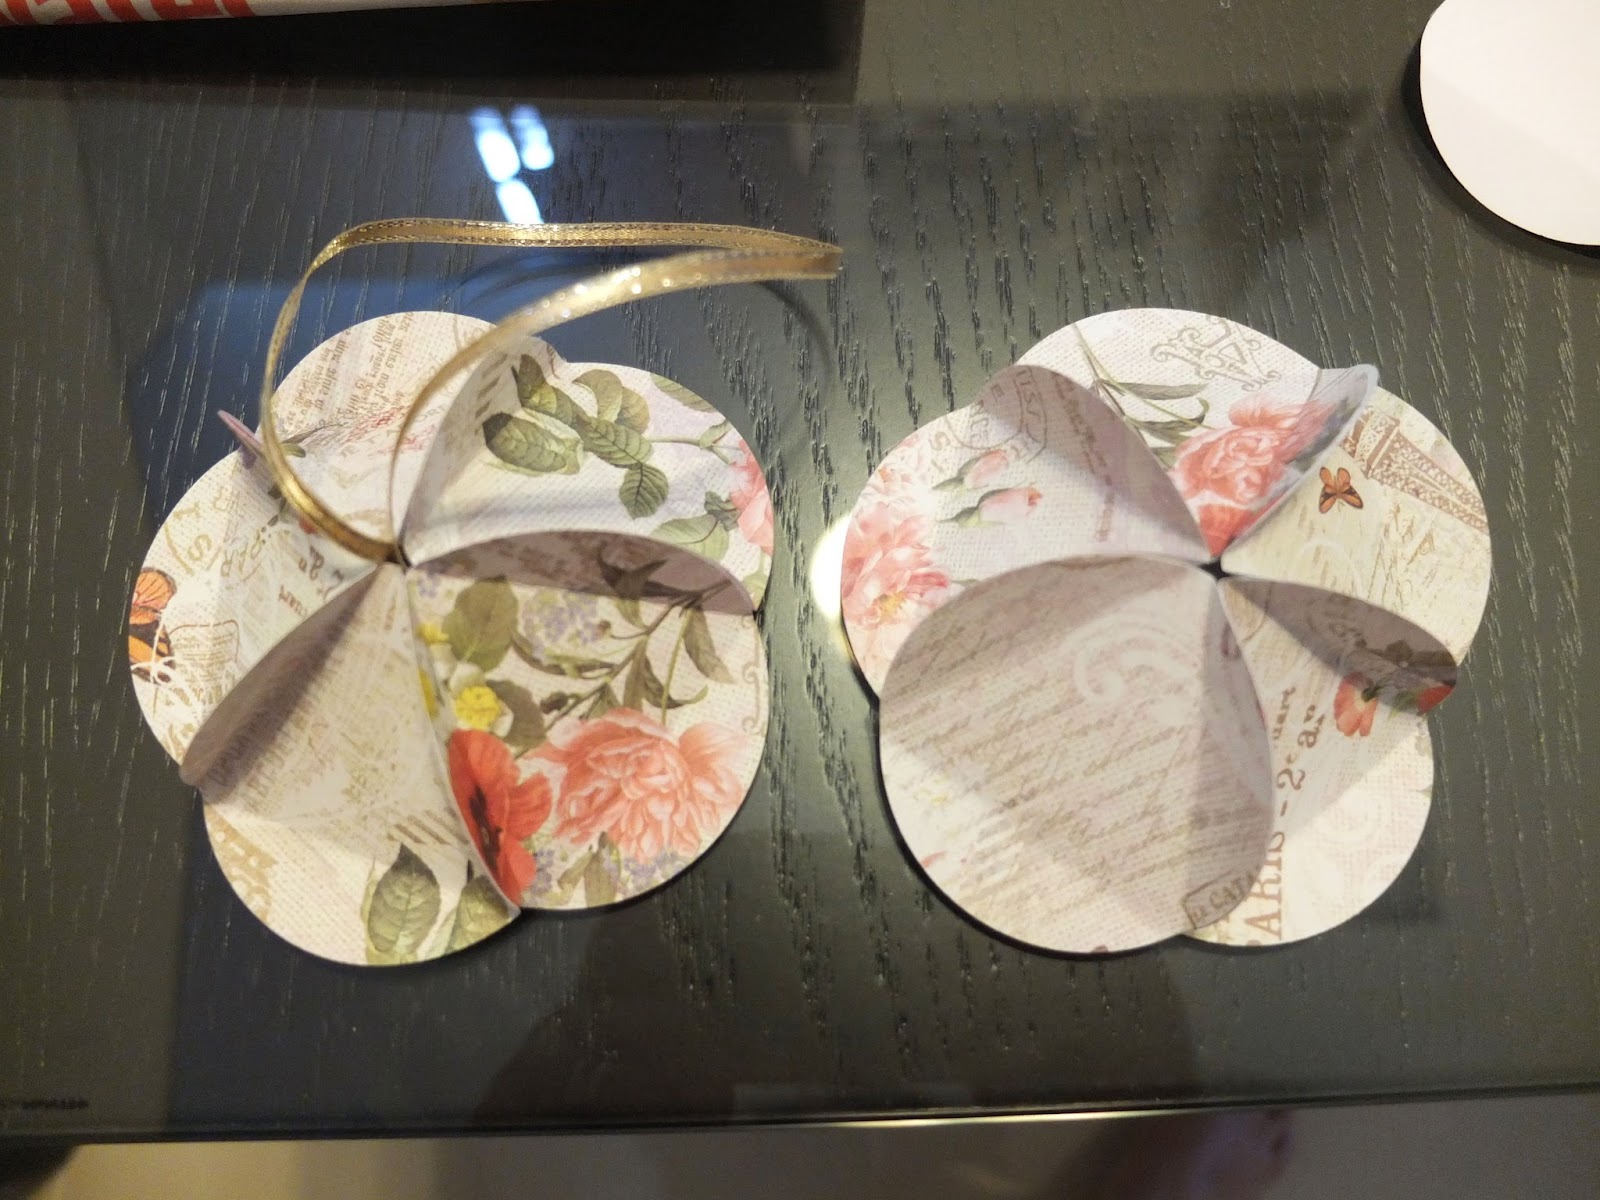
| Now to connect the top and bottom dome, this can be tricky, but somehow you will notice they will come together to form this gorgeous geometric ornament. |
 |
| And you keep on going until your fingers hurt and your elf says, 'Ok! That's enough already!'. |
 |
| See! All done. |
 |
| Now to go outdoors for a little fresh air. |
 |
| Boo yah! |
 |
| My Chrismas Tree all decked out in baubles and paper ornaments. |


